Monday, December 27, 2010

Ants on a Log


With the holiday season amongst us once again, many of us are spending (too much) time in the kitchen baking sweet treats. As it always does, food plays a huge role in Christmas and New Year celebrations; however, that does not mean that it has to make an impact on your weight. Studies show that the average holiday weight gain is about one pound. Even more disturbing is the evidence that for most people, that one pound is there to stay. That is one extra pound that you do not need to carry around with you for the rest of your life. Have no fear however, for there are many easy ways to keep away from this seemingly unavoidable tradition—all you have to do is be mindful of what you are eating. Stick to the following tips and you’ll be on track to starting a new year feeling great.

1. Eat in moderation
This is the big one. If you were to remember just one tip, it would be to eat in moderation. Keep your servings sizes small so that you can enjoy all your favorite holiday treats without consuming extra calories. Use a small plate and don’t be tempted to go back for more.

2. Don’t forget to exercise
When you exercise, you are not only burning calories, but also using the time that you might otherwise have used to eat to do some physical activity. Exercising can also be every enjoyable and keep your heart, lungs, and bones strong and healthy. If you have a treadmill, put it in front of the TV so that you can watch your favorite show and exercise at the same time. Spending time outdoors is sure to burn some calories, but if it’s too cold outside, why not hit the mall and engage in some serious speed shopping?

3. Indulge in hot drinks
Hot drinks such as cider, hot chocolate, and eggnog are delicious fluids to have during the winter season. Because people tend to drink hot drinks slower than cold drinks, you’ll have fewer refills, which means fewer calories consumed.

4. Fill up on your fruits and vegetables
You should be following this rule all year round, but especially during the time of year when junk food is readily available. Aim for at least five servings of plants a day, and from a broad range of colors. Different colored fruits and veggies provide different nutrients so that you can get all your essential vitamins naturally. Enjoy your crunchy veggies raw and unadorned, or with a healthy dip such as hummus.

5. Stay hydrated
Stay hydrated. Stay hydrated. Stay hydrated! Although the temperature outside has dropped tremendously in the last few weeks and you may not feel as thirsty during the winter months, your body still needs to stay hydrated. Water should always be your first choice when selecting a drink. Water is vital for the regulation of body temperature and metabolism. It’s refreshing, cheap, and best of all, calorie free. Drink one or two cups of water before every meal—you will feel just as full, without consuming as many calories. So guzzle that hydrogen and oxygen, and your body will surely thank you for it.

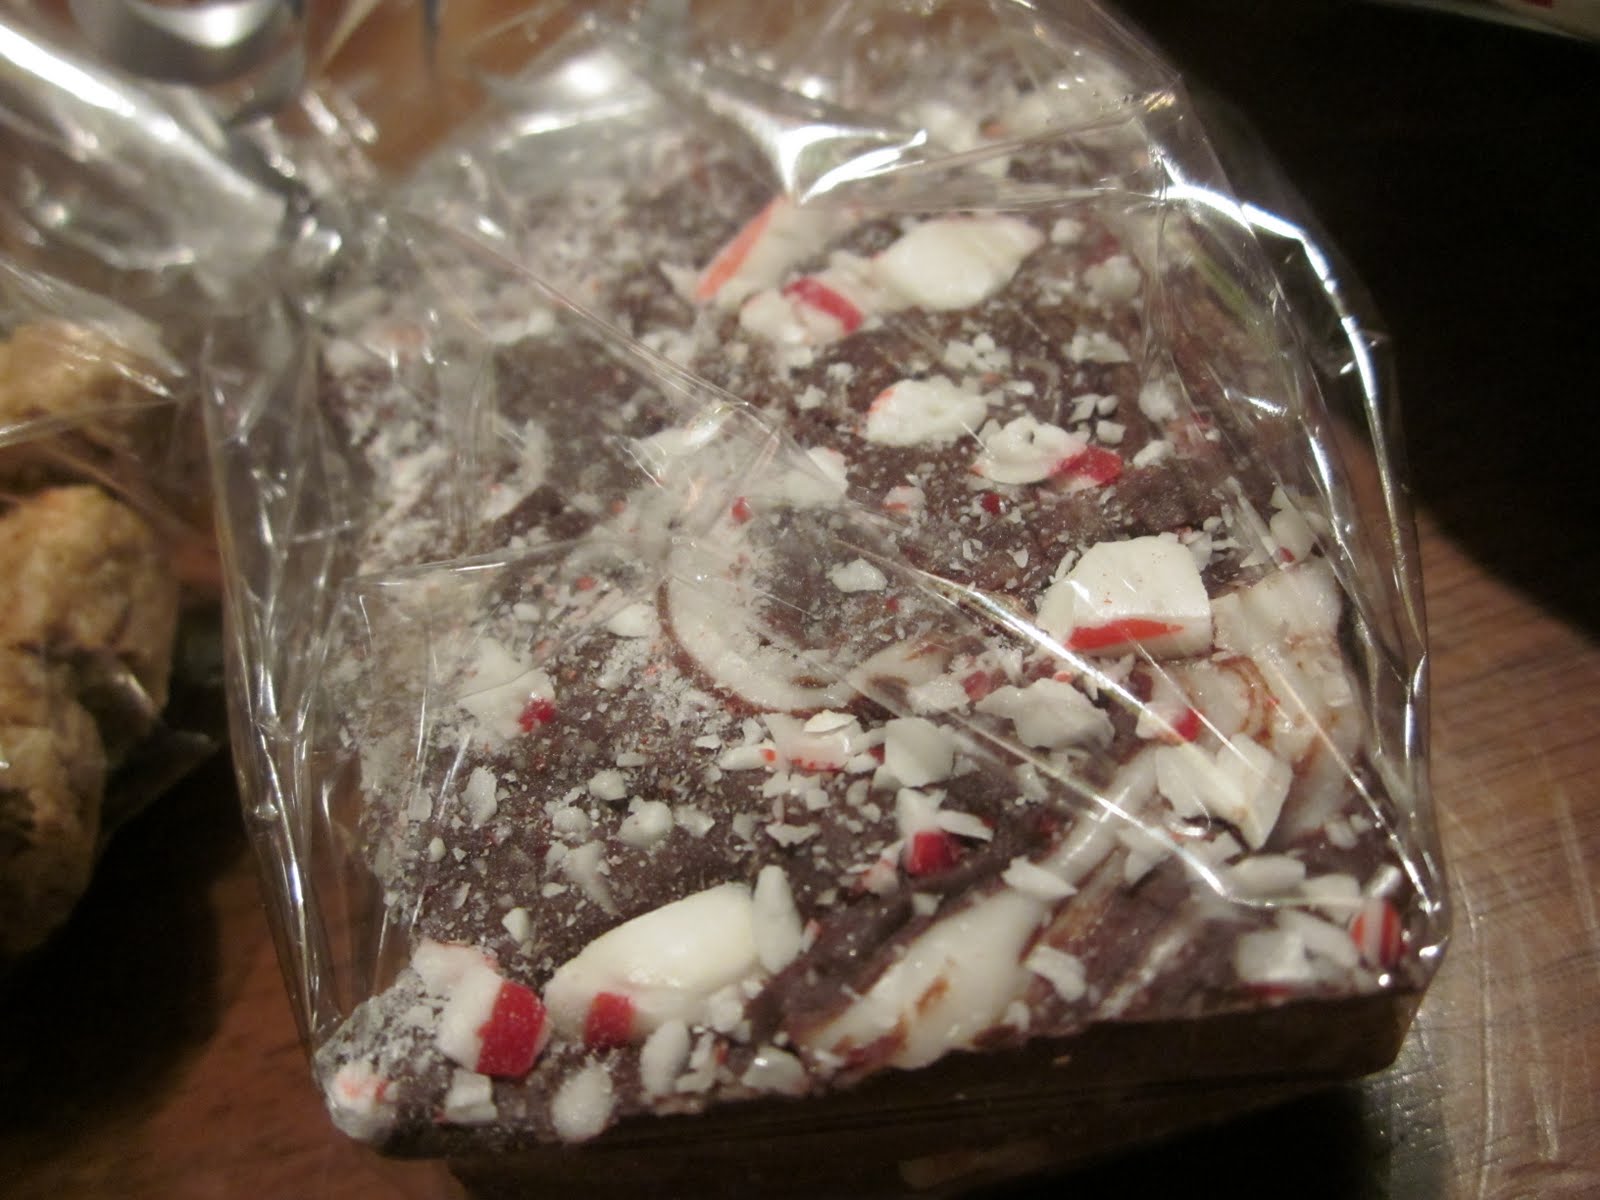
6. Eat some candy now and then
When it’s time for dessert, suck on a candy cane or nibble a piece of dark chocolate. Instead of adding to your daily intake up to 200 calories for just one cookie, you can enjoy a candy cane for just 60 calories. Alternatively, chew some minty gum. Minty gum kills your desire for food and inhibits you from chewing food—unless you want bits of food stuck in your gum!


Ants on a log are not only for kids—they are a delicious and easy snack for anyone who enjoys good food and wants some fun. The almond butter provides protein and healthy fats so that you feel full for longer. I like almond butter in my ants on a logs, but use peanut butter or cream cheese instead if that if what you desire. Did I mention these were very healthy too? In fact, you can get your serving of vegetables, fruit, AND protein by enjoying this delicious snack.

Ingredients

5 stalks celery
4 tbsp almond butter
¼ cup raisins

Directions

1. Spread the almond butter in the hollows of the celery stalks and top with raisins. Easy peasy lemon squeezy!


Monday, December 20, 2010

Christmas Cooking: Gingerbread Men and Peppermint Bark


The countdown to Christmas has finally begun. With the Christmas tree up and adorned in ornaments and pretty lights, presents hidden in secret places, and Christmas music taking over radio stations, I’m ready to just chill and celebrate the holiday season. However, with the amount of schoolwork and college applications I still have to work on, it’s been difficult to get into the holiday spirit. What do I do when I need a quick fix of joy? Well, I bake of course!

Christmas baking is one of the best things about the season. I love to cook, and I love to give away food that makes other people happy. Christmas baking is all about having fun, making a mess, and creating smiles. I always spend way too much time browsing websites and blogs for recipes the few weeks before Christmas. Everything looks so amazing; I just want to make it all!

Gingerbread men are definitely one of the most popular treats during Christmas. Why not make a few to stand by your deliciously decorated gingerbread house? These gingerbread men are just too adorable. How can you eat the little man staring back at you with that jolly smile? Well it’s sure no problem when they taste absolutely delicious. The aroma that comes out of the oven and into my nostrils when these treats are baking is simply to die for.


Peppermint is another flavor that makes bold appearances these last few weeks of the year. It adds a complexity to any dessert, and pairs perfectly with chocolate. I was not able to eat these treats because of my New Year’s resolution, but my friends and family told me they were delicious. There’s only ten more days before I can eat chocolate again! I’m definitely quite excited.

Because it's Christmas, let yourself enjoy some treats. While these gingerbread cookies are definitely not considered healthy, they do contain some healthy ingredients such as ginger and molasses. Molasses are a great source of iron, calcium, and manganese—all of which are essential minerals. As I’m sure you’ve heard before, chocolate can also be good for you. Just remember to splurge on little portions to avoid the dreaded holiday weight gain.

Add finishing touches to these Christmas treats by wrapping them in cellophane, tying a ribbon around the package, and attaching a little note. Give them to friends and they will be the Christmas presents that everyone’s talking about.

Scrumptious homemade sweet treats are all people want for Christmas this year. Dive into the Christmas spirit and spread some joy to every girl and boy!

Gingerbread Men

Ingredients

½ cup trans fat free margarine
½ cup sugar
½ cup molasses
1 egg yolk
2 cups all purpose flour
½ tsp baking powder
½ tsp baking soda
1 tsp cinnamon
1 tsp ground cloves
1 tsp ground ginger

For the royal icing:
1 egg white
½ tsp lemon juice
1 ¾ cup confectioners sugar

Directions

1. In a large bowl, cream together the trans fat free margarine and sugar until smooth. Stir in molasses and egg yolk. Combine the flour, baking powder, baking soda, cinnamon, cloves, and ginger; blend into the molasses mixture until smooth.
2. Preheat the oven to 350 degrees F. On a lightly floured surface, roll the dough out to about 1/4 inch thickness. Cut into gingerbread men with cookie cutters. Place cookies on lined cookie sheets.
3. Bake for 8 to 10 minutes in the preheated oven, until firm. Remove from cookie sheets to cool on wire racks. Frost and decorate when cool.

For the icing:
In a large mixing bowl, beat egg whites and lemon juice together, adding the powdered sugar until the mixture holds stiff peaks. Fill a piping bag with the icing and pipe as desired.


Peppermint Bark

Ingredients

2 (12 ounce) packages semisweet chocolate chips
1 tsp canola oil
1 tsp peppermint extract
5 peppermint candy canes, crushed

Directions

1. Line a 9x12 inch pan with parchment paper.
2. Melt the semisweet chocolate with the oil in a double boiler over just barely simmering water, stirring frequently and scraping down the sides with a rubber spatula to avoid burning.
3. When the chocolate is melted, stir in 1 teaspoon of the peppermint extract. Pour the melted chocolate into the prepared pan and it spread to the sides. Sprinkle the crushed candy cane pieces over the top. Chill in the refrigerator until set, about 1 hours.
4. Break into small pieces to serve.


Friday, November 26, 2010

French Almond Macaroons


Happy Thanksgiving! The holiday season is finally arriving again with Thanksgiving now past and Christmas just around the corner. This is my second year celebrating Thanksgiving, and it is already clear to me that Thanksgiving is all about family and food. Turkey, stuffing, sweet potato casserole, pumpkin pie… Thanksgiving dinner truly is the epitome of comfort food.

My family and I had Thanksgiving dinner this year at a friend’s house, so I did not cook an oversized chicken or any of the typical chow this year. Instead, I decided to experiment a little, and make some French almond macaroons. Macaroons are one of those things that I’ve been meaning to make for a long time, but never have had the chance to do so. Finally with a four and a half day weekend on my hands, I decided I could spare a few hours.


These dainty fellas were very time consuming. First of all, I had to make my own blanched almonds—not from scratch, but from raw almonds of course. It was pretty cool to “pop” the skin off. Next time though, I would definitely just buy the almonds already blanched. Then came piping every little kiss one by one… If you don’t have a piping bag, you can create a makeshift one by using a resealable plastic bag and snipping one of the corners off. While these macaroons took a lot of time and effort, they were definitely worth every single drop of sweat. In fact, I think that they were even more scrumptious because of the effort I put into making them.

Traditionally, macaroons are sandwiched with a creamy ganache or buttercream, but I decided to take a short cut (and rid some fat calories) by using marshmallow fluff. It was the first time that I had fluff, and the texture was pleasantly spongy. I’m surprised that they keep their spring for so long in a jar. I like these macaroons with a cup of refreshing green tea—the flavors combine perfectly in your mouth. Bon Appétit!

Ingredients

1 cup blanched almonds
1 1/2 cups icing sugar
3 large egg whites
3/4 tsp salt
3 tbsps granulated sugar
Red food coloring
8 tbsps Fluff

Directions

1. Pulse almonds with 1/2 cup confectioners sugar in a food processor until very finely ground. Transfer to a bowl and rift in remaining cup icing sugar, stirring to combine.
2. Beat egg whites with salt in another bowl with an electric mixer at medium speed until they just hold soft peaks. Add the granulated sugar a little at a time, beating, then increase speed to high and continue to beat until whites just hold stiff, glossy peaks. Add drops of food coloring to reach desired shade and mix at low speed until evenly combined.
3. Stir almond mixture into meringue with a rubber spatula until completely incorporated.Spoon batter into bag, pressing out excess air, and snip off 1 corner of plastic bag to create a 1/4-inch opening. Twist bag firmly just above batter, then pipe peaked mounds of batter onto lined sheets.
4. Let cookies stand, uncovered, at room temperature for 20 to 30 minutes or until the tops are no longer sticky and a light crust forms. Meanwhile, preheat oven to 300°F.
5. Bake cookies, switching position of sheets halfway through baking, until crisp and edges are just slightly darker, 20 to 25 minutes. Cool completely on sheets on racks. Sandwich with marshmallow fluff.


Friday, November 19, 2010

Banana Cupcakes with Cream Cheese Icing


What could be better than banana bread, baked in cute portions, all jazzed up with creamy frosting and topped with crunchy nuts? It’s a dream come true, a fortune cookie proved authentic, a reason for living (aside from the other 2 billion of course).

What do you do when you have leftover cream cheese frosting? Why you find a recipe to use it of course. I guess you could eat it straight from the bowl, but that would be a little gross, not to mention totally infringing on my nutritional standards.

What is one of the most potassium rich fruits? It’s your common food with the apes, the one that goes better with peanut butter than jelly does, the food b is for, after a is for apples. It’s your friend, the banana.

What reduces the risk of high blood pressure and stroke, helps your kidneys function properly, reduces stress, and keeps you up and running? Yep you guessed it. Potassium!

What…

Do you really need any more reasons to try out this recipe?

Ingredients

½ cup trans fat free margarine
1 ½ cups sugar
2 eggs
1 tsp vanilla extract
1 cup mashed ripe bananas
¼ cup buttermilk
2 cups all-purpose flour
1 tsp baking powder
¾ tsp baking soda

For the cream cheese frosting:
1/2 pound cream cheese, softened
1 stick butter, softened
1 tsp vanilla extract
2 cups sifted confectioners' sugar

Directions

1. Preheat the oven to 350 degrees F.
2. In a large mixing bowl, cream the margarine and sugar. Add the eggs, vanilla, bananas and buttermilk. Combine the flour, baking powder, and baking soda; add to the banana mixture. Fill 18 paper-lined muffin cups two-thirds full.
3. Bake in the oven for 15-20 minutes or until a toothpick comes out clean. Remove to wire racks to cool completely.
4. In a large mixing bowl, beat the cream cheese, butter and vanilla together until smooth. Add the sugar and on low speed, beat until incorporated. Increase the speed to high and mix until very light and fluffy. Frost cupcakes and enjoy!


Saturday, October 30, 2010

Red Velvet Cupcakes


Should I go trick or treating this year? With Halloween 2010 in just one day, I began pondering this question once again. While some would argue that as a senior in high school, I am too old for trick or treating, others would argue that you are never too old for trick or treating. I was surprised to hear that there are some towns set to fine kids over the age of 12 who TOT. I think that that law is simply absurd. Where is the Halloween spirit America? Halloween is not only a time to get free candy; it is a time to let the creativity of a child reignite to find only the “best Halloween costume ever.” (Of course, the free candy really is the biggest incentive for door hopping on a cold fall evening.)

Along with Reese’s, Snickers, and Twix, dirt cake, almond witch fingers and other scary foods are a must on the menu for October 31st. I have wanted to make red velvet cupcakes for a while now, and with the intense red of the cupcakes and the gory colors of Halloween somewhat related, I finally had an excuse to do so.

At first, I could not understand the popularity of red velvet cake. Was it not simply vanilla cake dyed blood red with the help of food coloring? After some intense Googling, I discovered that red velvet cake is one of those desserts that carry much history with it. While most recipes now call for food coloring, the red color was originally created through the reaction between vinegar and buttermilk, which helped to reveal the anthocyanin pigment in the cocoa.


These cupcakes are far from healthy, especially with the cream cheese frosting. Maybe you could convince yourself of its nutritional benefits in that at least there is no butter, but rather heart-healthy oil. Try to slather on as little icing as possible (the cakes are delicious just as is). Remember though, that it is Halloween, and you have to allow yourself a treat now and then.
Trick or treat? I’ll take the treat thanks.

Ingredients

2 1/2 cups all-purpose flour
1 1/2 cups sugar
1 tsp baking soda
1 tsp cocoa powder
1 1/2 cups vegetable oil
1 cup buttermilk, room temperature
2 large eggs, room temperature
2 tbsp red food coloring
1 tsp white distilled vinegar
1 tsp vanilla extract

For the Cream Cheese Frosting:
1/2 pound cream cheese, softened
1 stick butter, softened
1 tsp vanilla extract
2 cups sifted confectioners' sugar

Directions

1. Preheat the oven to 350 degrees F. Line 2 (12-cup) muffin pans with cupcake papers.
In a medium mixing bowl, sift together the flour, sugar, baking soda, salt, and cocoa powder.
2. In a large bowl gently beat together the oil, buttermilk, eggs, food coloring, vinegar, and vanilla with an electric mixer. Add the sifted dry ingredients to the wet and mix until smooth and thoroughly combined.
3. Divide the batter evenly among the cupcake tins about 2/3 filled. Bake in oven for about 20 to 22 minutes, turning the pans once, half way through. Test the cupcakes with a toothpick for doneness. Remove from oven and cool completely before frosting
4. For the Cream Cheese Frosting:
In a large mixing bowl, beat the cream cheese, butter and vanilla together until smooth. Add the sugar and on low speed, beat until incorporated. Increase the speed to high and mix until very light and fluffy.


Friday, October 29, 2010

Pumpkin Overload: Cookies and Biscotti


Walking through piles of fallen leaves every morning to school, I realize that fall has suddenly come. The arrival of autumn means Halloween, Thanksgiving, and of course, an abundance of pumpkins. While pumpkins are great for carving and decorating the house for the spooky season, they are also great for making into delicious cookies. When I think of fall food, I think of comfort food, and when I think of comfort food, I think of pumpkins. The smooth texture and slight sweetness of the bright orange flesh allures my taste buds. I have always loved pumpkins and could eat them simply steamed, boiled, or microwaved. However, I do enjoy exploring new ways to cook my favorite foods.

After flipping through my October issue of Cooking Light for some fall inspirations, I decided on whipping up two takes of pumpkin cookies: the American kind, and the Italian kind. The American kind, or simply, pumpkin cookies, are what you would expect pumpkin cookies to be like. They are moist, aromatic, and scrumptious. While the texture is more like a cake’s than a cookie’s, they hit the spot just as good, if not better, than your old chocolate chip cookies. The Italian kind is biscotti-- a hard biscuit that is great dipped in coffee or simply gnawed on.

Did I mention that pumpkin is super healthy too? Yes, in fact, it’s healthy enough (and super enough) to be deemed a superfood—a scientific term for food that are particularly good for you since they provide many healthy nutrients. Pumpkins are a strong contender against carrots for their powerful protection of vision due to their bright orange colors. Getting your daily need of fiber without digging out the cardboard is easy with pumpkin in your diet. Pumpkin is also extremely low in calories; one cup of cooked pumpkin has the same number of calories as two Dum Dum Pops. Now you know what you should be giving out this Halloween…

With just two days until Halloween, it’s time to carve pumpkins, eat pumpkins, and have pumpkin parties. The spooky time of year is finally here so make these pumpkin goodies for your family, friends, and of course, yourself!

Pumpkin Cookies

Ingredients

2 cups all purpose flour
1 1/4 tsp baking powder
1 tsp baking soda
1 tsp ground cinnamon
1/4 tsp ground ginger
1/8 tsp ground cloves
2 large eggs
1 cup light brown sugar
1/2 cup oil
1 tsp vanilla extract
1 cup canned pumpkin puree

Directions

1. Preheat oven to 325 degrees F and place oven rack in the center of the oven. Line two baking sheets with parchment paper.
2. In a large bowl, sift or whisk together the flour, baking powder, baking soda, ground cinnamon, ground ginger, and ground cloves.
3. In the bowl of your electric mixer, or with a hand mixer, beat the eggs and sugar until light and smooth (about 2 minutes). Beat in the oil, vanilla extract, and pumpkin puree. Add the flour mixture and beat until incorporated. Using a tablespoon, place small mounds of batter onto the prepared baking sheet, spacing about 2 inches (5 cm) apart.
4. Bake for about 15 - 18 minutes or until a toothpick inserted in the center of a cookie comes out clean. Remove from oven and transfer to a wire rack to cool completely before frosting.


Pumpkin Biscotti

Ingredients

2 1/2 cups flour
1 cup sugar
1 tsp baking powder
1 tsp of cinnamon
1/2 tsp of nutmeg
Pinch of ginger
Pinch of cloves
2 eggs
1/2 cup of pumpkin puree
1 tsp of vanilla extract

Directions

1. Preheat oven to 350°F. Sift together the flour, sugar, baking powder, and spices into a large bowl.
2. In another bowl, whisk together the eggs, pumpkin puree, and vanilla extract. Pour the pumpkin mixture into the flour mixture. Give it a rough stir to generally incorporate the ingredients, the dough will be crumbly.
3. Flour your hands and a clean kitchen surface and lightly knead the dough. Lightly grease a baking sheet or line it with parchment paper. Form the dough into two logs. The loaves should be relatively flat, only about 1/2 inch high. Bake for 20-25 minutes, until the center is firm to the touch.
4. Let biscotti cool for 15 minutes and then using a serrated knife cut into 1 inch wide pieces. Turn the oven to 300 F and bake for an additional 15-20 minutes. Cool completely.


Friday, October 15, 2010

Persimmon and Date Scones


Growing up in a commonwealth country, I lived on scones and jam. The scones in America are very different to the scones I had in New Zealand. I’ve found that US scones are much sweeter and denser than their NZ counterparts. Craving scones this afternoon, I dug out the Edmunds cookbook—a staple in the Kiwi’s kitchen.

I decided to add an Asian twist to the basic scone dough recipe I found in my beloved cookbook. My mom and I went to H-Mart the other night and were delighted to find persimmon pancakes in the grocery aisle. While the literal translation of this food is persimmon pancakes, they are more like dried persimmons. My mom talked much about them, reminiscing back to when she had them as a child in China. I was excited to try one of these mysterious flat rounds. It was white on the outside from edible mold, and orange, sweet, and sticky on the inside. I really enjoyed the flavor of these persimmon pancakes.

The addition of dried persimmon and dates to the plain scone recipe livens up the dough significantly. The texture and sweetness from the fruits makes the scone more exciting to bite into. You never know what you might get with each mouthful. You could get a date, a chunk of persimmon, or if you’re lucky, both…

Ingredients

3 cups flour
6 tsp baking powder
1 tbsp sugar
1/3 cup trans fat free margarine
½ cup chopped dates
2 dried persimmons, chopped into small cubes
1-1 1/2 cups Milk

Directions

1. Preheat the oven to 420 degrees F.
2. Sift flour, baking powder and sugar into a bowl. Rub margarine into the flour mixture until it resembles fine breadcrumbs. Stir in the chopped dates and dried persimmons. Add milk and mix quickly with a knife to form a soft dough. Knead a few times.
3. Divide the dough into two. Take each mound and form a flat circle approximately 1 inch high on a dusted surface. Using a sharp knife cut the dough into eight even sized pieces, like you would a cake.
4. Carefully transfer the dough onto a lined and greased oven tray leaving enough space between scones for rising. Brush the tops with milk. Bake in the oven for 12 minutes or until golden brown.


Tuesday, October 12, 2010

Peanut Butter Cookies


I’ve been eating way too much peanut butter in the past few weeks. Its smoothness, along with the surprise crunch now and then is simply irresistible. There’s simply nothing stopping me just dipping a spoon (or my finger) into the jar and pulling out the golden goodness inside.

Honey Bunches of Oats is another addiction I’ve recently adopted. In fact, my addiction is so bad that I had the cereal for breakfast, lunch, and afternoon tea all in one day. Yesterday, I had three bowls of it just for afternoon snack. I just discovered their strawberry flavor and it is SO GOOD. I could talk about it all day.

But we’re here to talk peanuts, so let’s get on with it.

Today was my friend’s birthday (Happy 18th Rebecca!) and she received some peanut butter cookies with Hershey’s Kisses on top. As soon as I savored the sweet, moist, and aromatic cookie (I ripped the Kiss off the top to maintain my new year’s resolution) I fell in love. At that moment, I knew that I just had to make my own batch that afternoon. There’s no recipe that uses up peanut butter quicker than peanut butter cookies. For just one batch of these, half a jar of crushed nuts must be sacrificed. For course, there’s no denying that they are 100% worth it.

These cookies are incredibly rich so make sure you had a glass of cold milk by your side. Remember, calcium is your friend! The batch I made this afternoon will be for my peers at school tomorrow. I sure hope they enjoy them as much as I did!


Ingredients

3/4 cup trans fat free margarine
1/2 cup light brown sugar
1/2 cup white sugar
1 large egg
1 teaspoon pure vanilla extract
3/4 cup crunchy peanut butter
2 cups all purpose flour
1/2 teaspoon baking soda
1/4 teaspoon salt

Directions

1. Preheat oven to 350 degrees F. Line two baking sheets with parchment paper.
2. In a large bowl, beat the butter and sugars until light and fluffy. Beat in the peanut butter. Add the egg and vanilla extract and beat to combine. In a separate bowl whisk together the flour, baking soda, and salt. Add to the peanut butter mixture and beat until incorporated.
3. Roll the batter into 1 inch balls. Transfer the cookies to the prepared baking sheet, placing about 2 inches apart. Then, using the tines of the fork that has been dipped in white granulated sugar, make a crisscross pattern. You could also use the bottom of a cup to flatten them and etch in smiley faces.
4. Bake the cookies for about 10 to 12 minutes, or until the cookies are lightly browned around the edges. Remove from oven and place on a wire rack to cool.


Tuesday, October 5, 2010

Spinach and blueberry salad with walnuts


This year I am features editor of my school's student newspaper- The Merionite. Being part of the features crew is great because our section encourages articles on essentially anything that people find interesting. I will be having a monthly nutrition column, giving tips on healthy eating with a different theme each time. For the September issue I wrote about foods that can make you smarter.

Nourish Your Mind, While Nourishing Your Body

The last vestiges of summer are suddenly fading and with another year of school to look forward to, it’s time to start sharpening that brain of yours. This year, like all other years, you promised yourself to try extra hard in school and get those desirable grades. Of course, studying extra hours at night can help improve your grades, but did you know that there are actually certain foods that are proven to improve your intelligence? Yes, many studies show that some foods help brain cells communicate, improve memory, and increase brain health. Obviously this doesn’t mean that you can simply indulge in these foods and forget about studying, but it does mean that there may be an additional way to help you achieve your best this year. So get yourself back on track with the following brain foods that are sure to power your mushy grey matter through the next nine months.

Coffee
The coffee bean is full of healthy antioxidants, amino acids, vitamins and minerals. Coffee’s caffeine is also vital to its protective affects.

Chocolate
We’ve all heard about the benefits of dark chocolate, yet we still feel guilty while eating it as it is still labeled as a “treat” food. Now it seems that chocolate is related to improving memory. This does not mean that you can hit the vending machine and just grab a Snickers Bar whenever; however, it does mean that occasional chocolate sessions are fine, and potentially beneficial.

Blueberries
You’ll be thankful of your love for these dark rounds when you hear of the mighty benefits they provide. Blueberries are arguably the best brain food and are shown to improve learning ability. In addition, they are one of the most powerful anti-stress foods. Try to avoid sweetened dried blueberries and opt for the fresh ones!

Walnuts
How could a nut that actually looks like a brain not provide you with brainpower? The healing power of walnuts is primarily due to their high concentration of omega-3 fats. These are the very fats that make up 60% of your brain (yes, you have a fat brain!).

Avocado
The monounsaturated fat in avocados promotes increased circulation and blood flow. Eating lots of avocado can also lower blood pressure levels, which is known to benefit the brain. Lower blood pressure may increase cognition and I.Q.

Apples
Here’s another reason to eat an apple a day: Apples are a great source of an antioxidant that protects your brain cells. Make sure to eat your apples with skin as that is where most of the antioxidants are found- it’s also a delicious and easy way to add fiber to your diet.

Note: “Although these foods are important to include in your diet to boost brain function, don't forget the importance of having an overall well balanced diet every day" (Tara Simpson, Registered Dietitian and Director of Client Care of Nutritional Health Systems).

To get a healthy dose of these brain foods, try tossing them into a salad. It’s an easy and delicious way to incorporate these foods into your diet. Don’t be afraid to experiment! Why not toss a few chocolate chips into your bowl? After all, they enhance brain function right?

Rainbow Salad

Ingredients

Raspberry vinaigrette salad dressing
2 tablespoons vegetable oil
2 tablespoons raspberry wine vinegar
2 tablespoons white sugar
1/2 teaspoon Dijon mustard
1/8 teaspoon dried oregano
1/8 teaspoon ground black pepper

1 (10 ounce) package baby spinach
1 Granny Smith apple, sliced thin
1 pint fresh blueberries
1/4 cup walnuts

Directions

1. Mix all the dressing ingredients in a small bowl.
2. In a large bowl, toss the spinach and sliced apple with the raspberry vinaigrette. Scatter the blueberries and walnuts over the top and serve.

Saturday, September 11, 2010

Classic Sweet Soufflés

Boy can Gordon Ramsey shout. Participation in Hell’s Kitchen might be enjoyable if you didn’t have Gordon cursing in your face all the time. But then again, it wouldn’t be Hell’s Kitchen then would it? Last night, I was watching another one of Ramsey’s cooking shows, MasterChef. One of the challenges on the show was to make a soufflé. It was said that making a soufflé tested a chef’s true capability best.

What has the soufflé done to deserve its reputation of being one of the hardest desserts to make? Making a soufflé does not break nails; in fact, I think that anyone could make one.

With the inspiration from primetime television, I whipped out my cooking books in search of a soufflé recipe. Most recipes online were for chocolate soufflés and as much as I wanted one, my new year’s resolution of not eating chocolate for a year prohibited me from making one. I found the following recipe for a plain sweet soufflé in A Cook’s Bible, a New Zealand cookbook. It uses flour to make what is known as a panade, which the beaten egg whites are then folded into. Some recipes for chocolate soufflés require no flour. Next year when I can eat chocolate again I would like to try out one of those recipes and see how it turns out.

Some say that a soufflé is just an embellished omelet. I couldn’t agree and disagree more. On one hand, with 5 eggs needed for 6 soufflés, the entire dessert is basically a flavored egg. On the other hand, savoring a soufflé brings much more pleasure than eating a morning omelet. The lightness and sweetness in a soufflé balances perfectly on the tip of your tongue.

When you take the soufflé out of the oven, you have 90 seconds to serve it before it sinks. As Gordon Ramsey said: “A soufflé waits for no one @%*&#$!”

Ingredients

2 tbsp butter
2 tbsp sugar
3 tbsp flour
½ cup milk
¼ tsp vanilla essence
5 eggs
1 tsp cornflour
icing sugar

Directions

1. Cream the butter and sugar, then stir in the flour.
2, Boil the milk and vanilla and whisk it into the creamed mixture to form a panade. Return the panade to a clean pan and stir to boiling point to thicken. Simmer for 1-2 minutes. Remove from the heat and leave it to cool a little.
3. Separate the eggs and beat the yolks into the panade, one at a time.
4. Whisk the egg whites to a stiff foam then whisk in the cornflour. Stir a quarter of the foam into the soufflé mixture. Gently fold in the remaining whites.
5. Pour into 6 greased and sugared ramekins.
6. Bake at 410 degrees F for approximately 16 minutes.
7. Serve immediately!!!!

Wednesday, September 1, 2010

Summer BBQ


There’s nothing that sums up summer food more than a barbeque with family and friends. For a great day out, all you need is a good park, a Frisbee, and some beautiful Angus steaks. Grilling is also very versatile and can accommodate anyone’s tastes buds. You can grill anything from apples to zucchinis, and everything in between. A great day can be arranged around a BBQ. Grill some kabobs for lunch, play a little game of ultimate, grill more meat and veggies for dinner, and then grill some peaches and pineapple for dessert.

There are many ways of preparing meat for a BBQ. One of the most popular options is by using a marinade. Marinating involves immersing the meat in a mixture of acid and spices and leaving it in the fridge for a few hours or overnight to soak. Marinating meat tenderizes and flavors the meat ready for the grill. Lemon juice, vinegar, and soy sauce are all acids that can be used in a marinade.


Another method of grilling meat is to simply season the meat right before putting it on the grill. In this way of cooking the meat, no liquids would be used, only spices. Some people also prefer to pre-cook meat before putting it on the grill to shorten the cooking time. This can easily be done by boiling or using the microwave.

No matter what you choose to cook and how you choose to cook it, a barbeque will make surely make any food taste better. While there are a few weeks of summer left, there’s no excuse to not go out and grill up a feast!